
Free crochet pattern
Easy ribbed crochet pumpkin from a rectangle
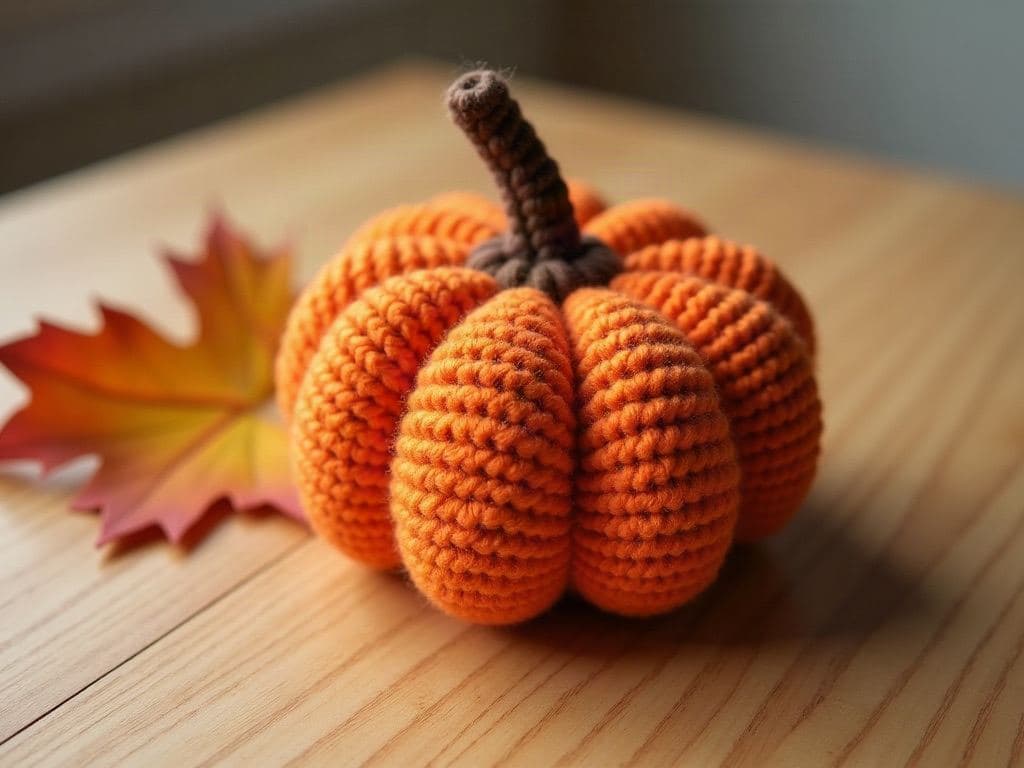
This crochet pumpkin starts as a flat rectangle of single crochet worked in back loops, which creates ridges. The rectangle is seamed into a tube, gathered at both ends, stuffed and wrapped with yarn to form segments, then finished with a small stem. It is about 4 inches across.
By the crochetpatterns.io editorial team · Reviewed · Editorial policy
By the crochetpatterns.io editorial team · Reviewed September 13, 2026 under our editorial policy · pattern testing in progress
| Detail | Value |
|---|---|
| Skill level | Easy |
| Yarn weight | Medium (#4) |
| Yardage | 60–80 yd (55–73 m) |
| Hook | 5 mm |
| Gauge | 16 sc and 18 rows = 4 in (10 cm) in sc through back loops. |
| Finished size | About 4 in (10 cm) across and 3 in (7.5 cm) tall |
| Time | about 1.5 hours |
Materials
- Worsted weight (#4) yarn in orange (A), about 70 yd / 64 m
- Small amount of brown (B) for the stem
- 5 mm (US H-8) crochet hook
- Polyester fibrefill, tapestry needle
Abbreviations (US terms)
Notes before you start
- Turning ch-1 does not count as a stitch.
- The row ridges run from top to bottom of the finished pumpkin.
Body
- With A, ch 21.
- Row 1: Sc in 2nd ch from hook and in each ch across, turn. (20 sc)
- Rows 2–40: Ch 1, sc blo in each st across, turn. (20 sc) Fasten off, leaving a 36 in (90 cm) tail.
Stem
- With B, make a magic ring, 6 sc in ring. (6)
- Rnds 2–4: Sc in each st around. (6) Fasten off with a long tail.
Finishing
- Fold the rectangle so Row 1 meets Row 40 and whip stitch the edges together with the tail to form a tube.
- Weave the tail through the row ends along one open edge and pull tight to close the bottom.
- Stuff firmly, then weave the tail through the row ends of the top edge and pull closed.
- Pass the tail straight down through the centre and out of the bottom, then wrap it up around the outside and back down through the centre. Repeat 5 more times, spacing the wraps evenly to make 6 segments. Pull each wrap snug.
- Sew the stem over the top centre.
Errata
No corrections have been published for this pattern. Found a mistake? Tell us and we will log the fix here with a date.
Frequently asked questions
How do I make a bigger pumpkin?
Chain more for a taller pumpkin and work more rows for a wider one. Keep the rows about twice the chain length for a round shape.
Can I use chenille yarn?
Yes. Chenille makes a plush velvet pumpkin; use a 6 mm hook and skip back loops, as chenille hides texture.